Showing posts with label Expert Vagabond. Show all posts

Monday, October 26, 2020

Visiting The Hidden Mayan Ruins Of Calakmul In Mexico

Calakmul Mayan Ruins Guide
Calakmul Mayan Ruins in Mexico
Campeche, Mexico

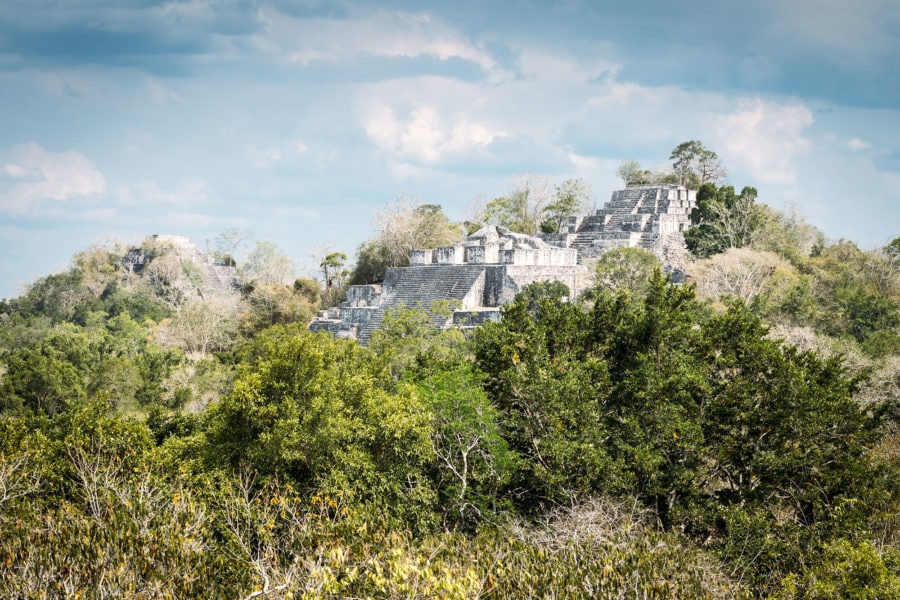
Calakmul is an ancient Maya ruined city located deep within a jungle biosphere on the Yucatan Peninsula. Here’s why it’s my favorite archeological site in Mexico!

Not many people make it down to the ruins of Calakmul compared to the other famous Mayan pyramids in Mexico like Chichen Itza or Tulum — mostly due to its very remote location near the border of Guatemala.

Calakmul is far away from any tourist cities, requiring a pretty long & dedicated trip out there to visit the site.

It’s a real hidden gem for those who wish to get off-the-beaten-path!

Located in the Mexican state of Campeche on the Yucatan Penninsula, the ruins are extensive and cover 2 square kilometers (0.77 sq mi).

Many sections have never been excavated, and because it only receives about a dozen visitors per day, it feels like a true “Indiana Jones” kind of experience.

In this travel guide, you’ll learn tips for visiting Calakmul, along with some interesting history about my favorite Mayan ruins in Mexico.

History Of The Calakmul Maya Ruins
Walking Through the Ruins
Calakmul Archeological Site

The ancient city of Calakmul is thought to have been populated with about 50,000 people. It was “re-discovered” and named by a biologist named Cyruss Lundell, who flew over the area in 1931.

Calakmul means “two adjacent mounds” in the Maya language — which makes sense as I’m sure the two main pyramids just looked like two mountains in the middle of a very flat jungle!

The city was the capital of a large regional state at the time. The Calakmul kingdom included 20 secondary cities such as La Muñeca, Naachtun, Sasilha, Oxpemul and Uxul. The population of the whole kingdom is estimated to be about 1.7 million people!

The equally large city of Tikal in what’s now Guatemala regularly fought with Calakmul — until Tikal won and took over in 700 AD. Eventually the city was abandoned and consumed by the jungle over hundreds of years.

Calakmul’s ruins and the surrounding jungle was declared a UNESCO World Heritage Site in 2002.

Calakmul Ruins Highlights
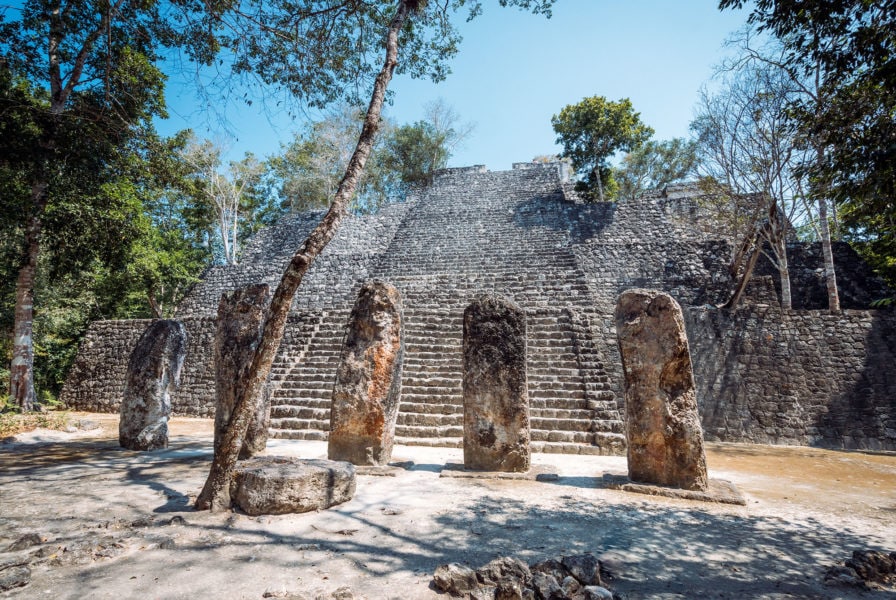
Calakmul Pyramids
Pyramid Structure 1
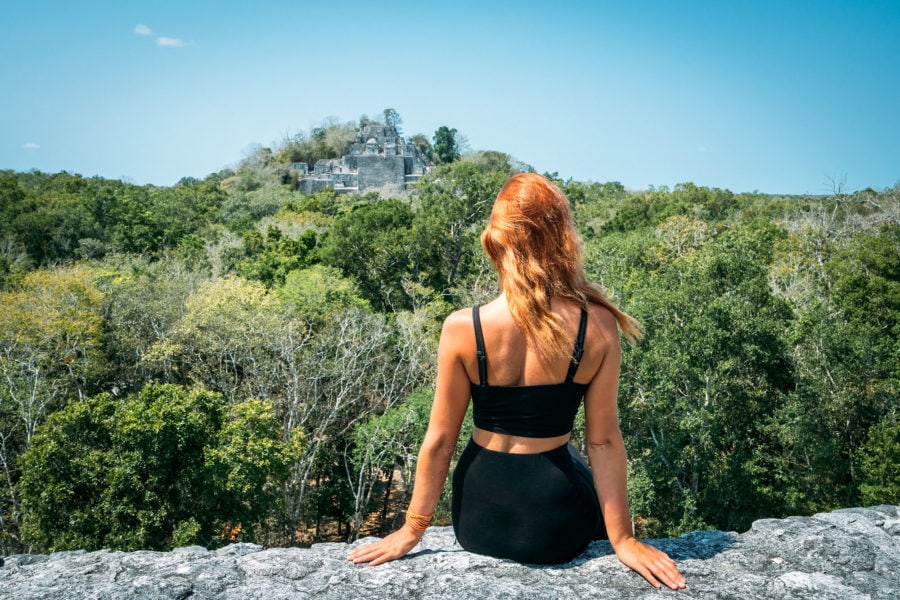
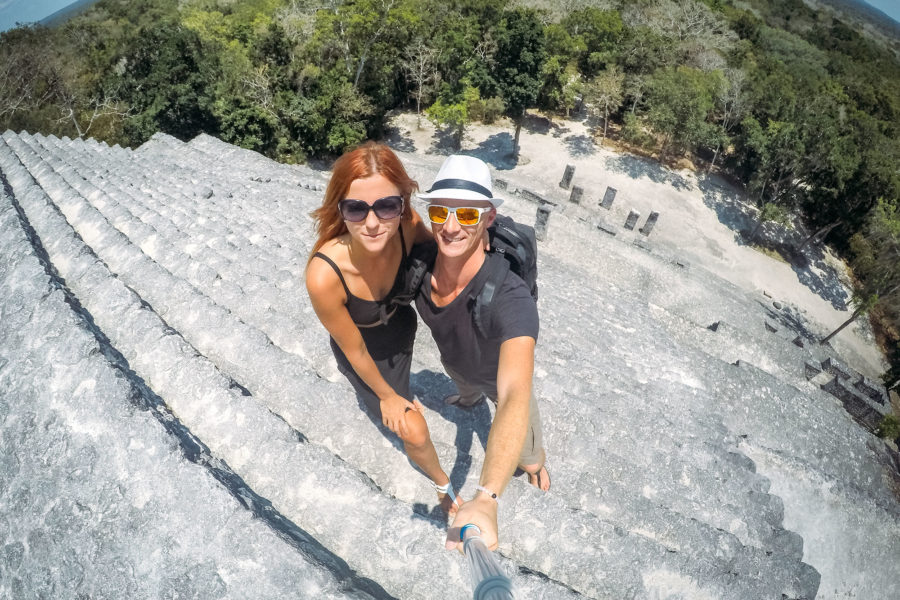
Anna Sitting at the Top
View From the Top of the Pyramid

Pyramid Structure 1

Among the many interesting structures found there are two gigantic pyramids — called Structure 1 & Structure 2. Structure 1 is the second highest pyramid at Calakmul, reaching a height of 130 feet/40 meters. One thing that makes Calakmul stand out from other sites is that you can climb these pyramids!

The steps of the pyramids are steep, and not very wide — maybe just the length of your foot. Some are narrower than that! You need to be careful climbing, and preferably not afraid of heights. Falling would be a disaster…
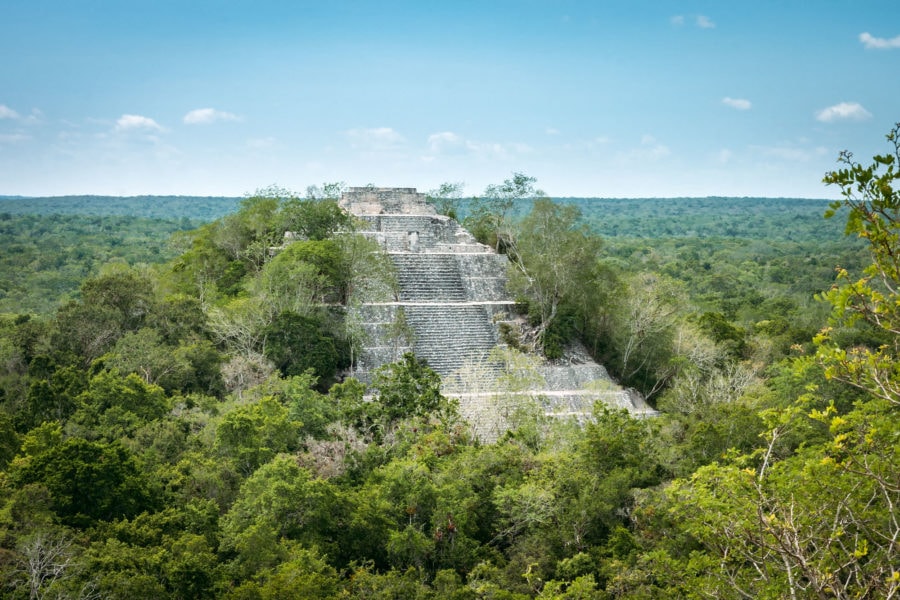
Pyramid Enveloped by Jungle
View of Structure 1 from Structure 2
Climbing the Pyramids

Pyramid Structure 2

The most impressive building in Calakmul is called Structure 2. This pyramid was built up a number of times over centuries to reach a final height of around 150 feet/50 meters.

It is the highest and largest structure in the Maya world. Nine royal tombs have been found inside the pyramid, some containing rich artifacts like jade masks.

Mayan Ball Court

Calakmul has its own Maya Ball Court, where athletes put a rubber ball (representing the sun) into a small stone circle perched very high on a wall, without using their hands OR feet.

Some carvings suggest that the winning team’s captain was decapitated, which was a sign of honor. The ball game is over 3,500 years old, making it the first organized game in the history of sports.

Games were played to resolve arguments between rival cities or as an alternative to all-out war.

Chiik Nahb Acropolis

The Chiik Nahb Acropolis, or “Place of the Water Lilly” is an area to the North of the site. Climbing this Acropolis gives you an excellent view of Structure 2 for photos.

This complex is famous for incredible painted murals recently discovered inside.
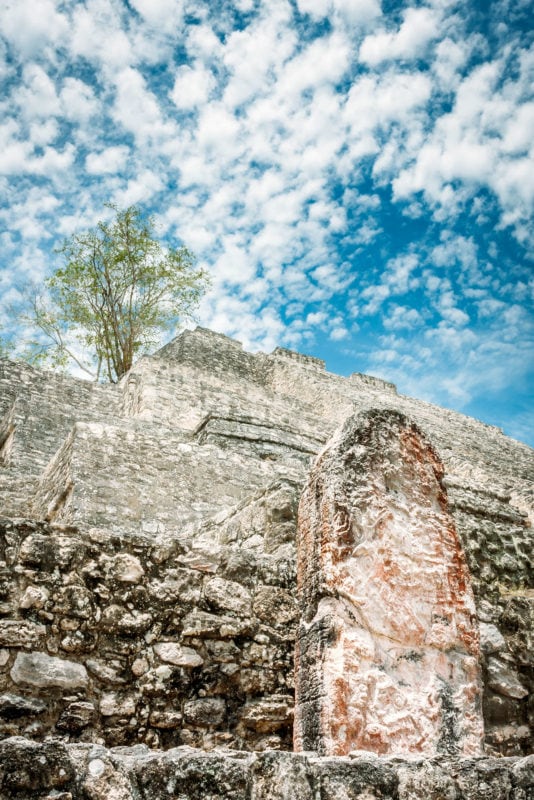
Mayan Stone Stelae
Maya Stelae with Red Pigment

Ancient Stone Stelae

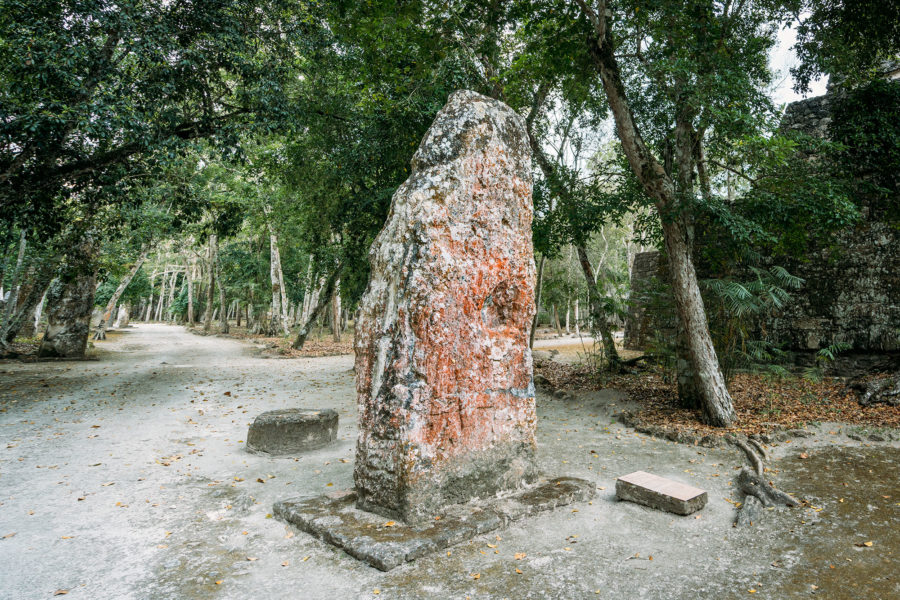
Many great stelae can be found at this site too — large slabs of stone that have been intricately carved with pictures and glyphs.

Unbelievably some of them still have their original color pigments showing! It’s crazy that the color has lasted so long…

The Biosphere Reserve
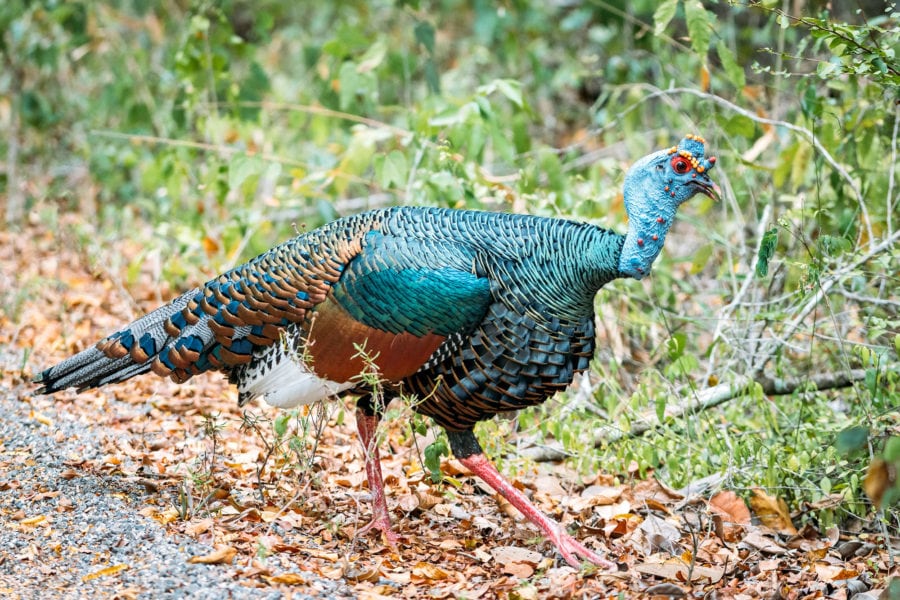
Calakmul Biosphere Reserve Wildlife
Blue Ocellated Turkey in Calakmul
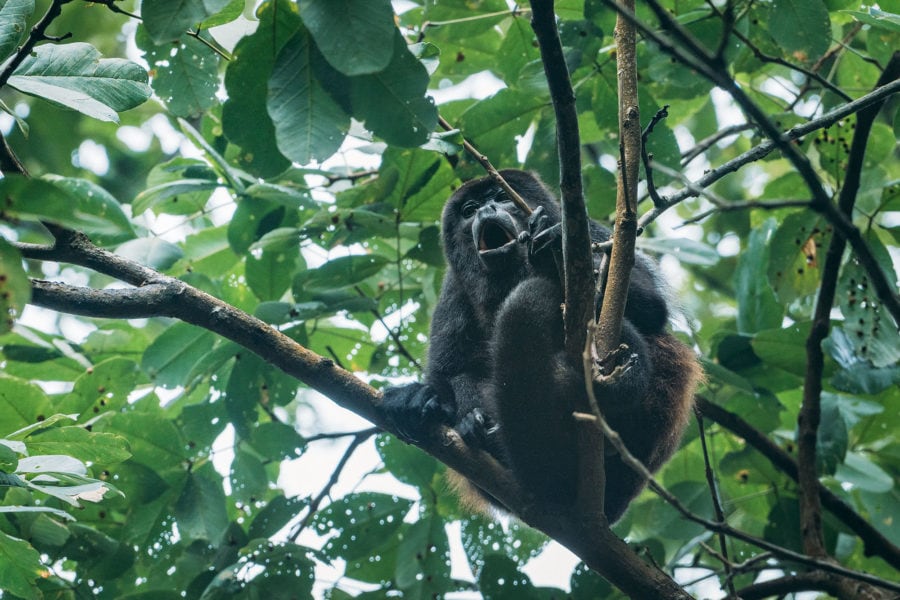
Howler Monkey Screaming
Howler Monkey’s are Loud!

The ruins of Calakmul are located inside the massive Calakmul Biosphere Reserve, 2,792 square miles of protected jungle.

You’ll find all sorts of wildlife living within the reserve, including Ocellated Turkeys, Howler Monkeys, Spider Monkeys, Baird’s Tapir, Tucans, and if you’re SUPER LUCKY — the very elusive Jaguar!

The best time to see wildlife on the drive up to the ruins is early in the morning, or right before sunset in the late afternoon.
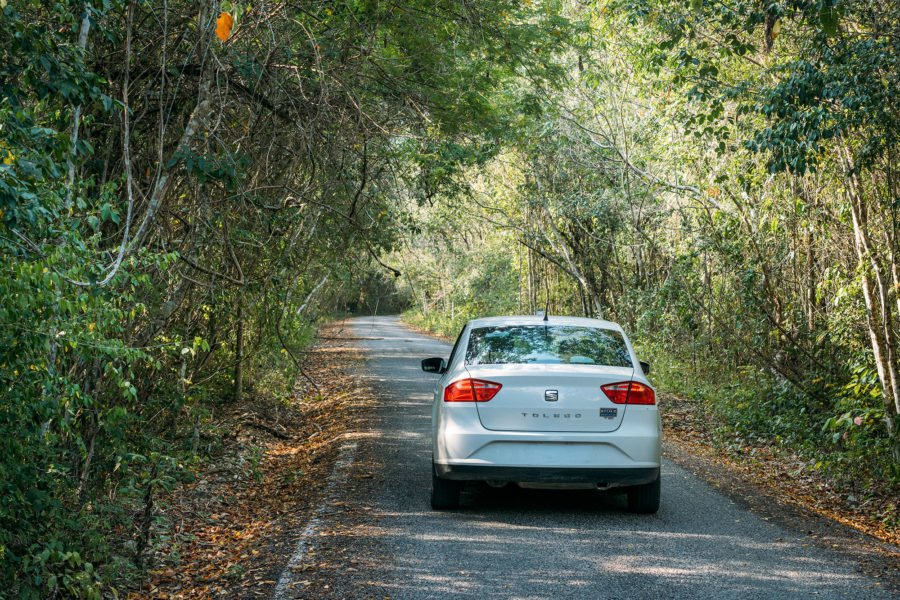
Driving to Calakmul Ruins
Driving to Calakmul through the Biosphere

Getting To Calakmul

Calakmul is much more difficult to reach than other Mayan ruins in Mexico. I’ve visited 3-times now, once through a combination of bus, taxi, and bicycle. Plus twice more with a rental car (it’s much easier!)

Rental Car

The best site to book your car is Discover Cars. They search both local and international car rental companies to help you find the best possible price. This is the easiest way to rent a car in Mexico.

CANCUN – Calakmul is 464 km (6 hours) from Cancun by car.
TULUM – The ruins are 334 km (4 hours) from Tulum by car.
CAMPECHE – Calakmul is 300 km (4 hours) from Campeche by car.

By Bus/Taxi

The closest town to Calakmul is a small city called Xpujil. There are buses that run from Campeche and Tulum to Xpujil via the Mexican ADO Bus Service.

Once in Xpujil, you can then hire an expensive taxi (the trip still takes an hour or so) to take you to the Calakmul ruins — they will wait while you explore for a few hours.
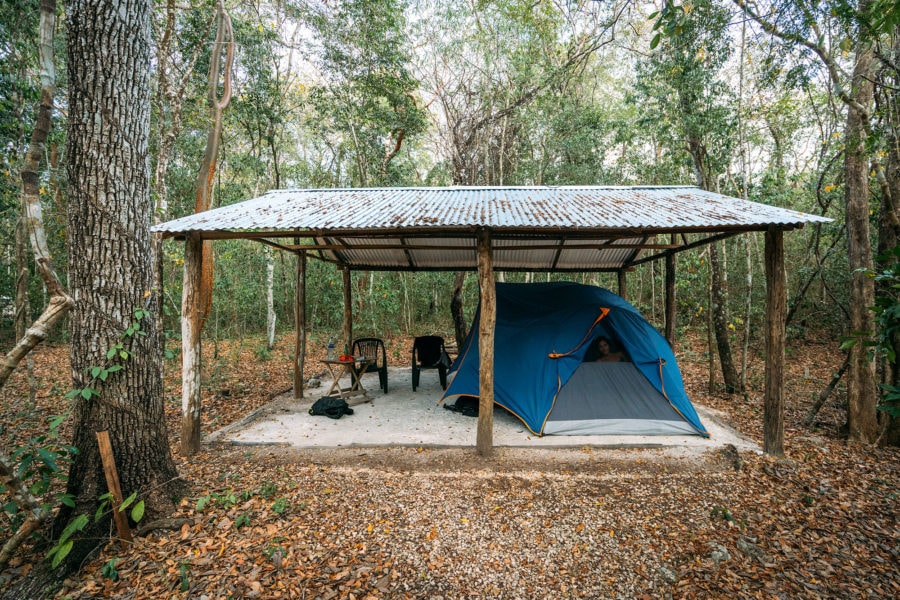
Camping in the Jungle
Camping at Campamento Yaax Che

Where To Stay Near Calakmul

Because Calakmul is basically in the middle of nowhere, you’re going to need to spend a night or two nearby. The closest towns are Xpujil and Chicana. Here are some suggestions for good places to stay during your trip to Calakmul…


Best Accommodation In Xpujil


Camping In The Calakmul Biosphere

If you’re up for an adventure, I highly recommend camping within the Calakmul Biosphere Reserve. There are a few campgrounds located inside, and you can even rent a tent if you don’t have your own. The place I’ve stayed during all my trips is called Campamento Yaax Che.

Just be aware that camping overnight in the jungle is a very LOUD experience! Walking around in the dark with howler monkeys screaming at you from the tree tops is something you’ll never forget…
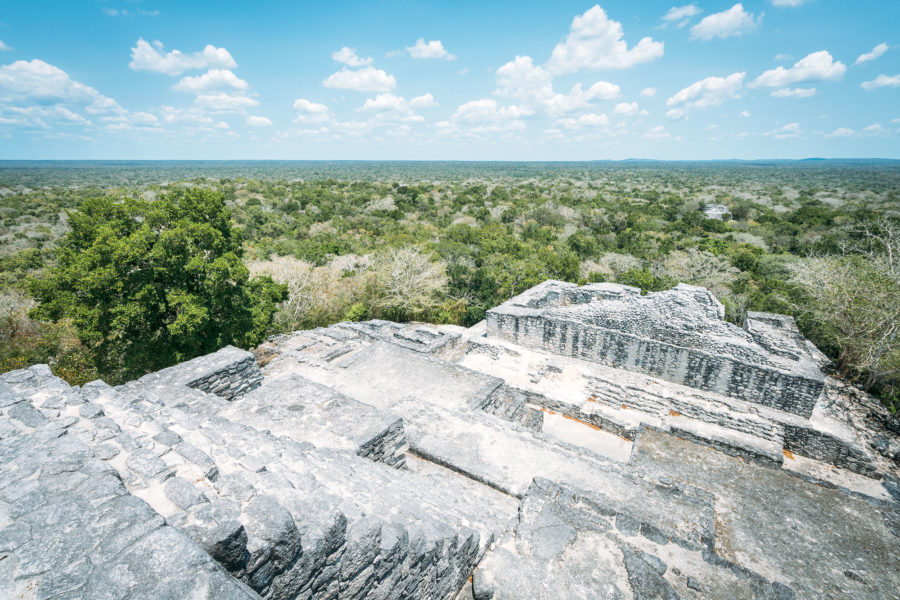
Jungle Pyramid in Mexico
Jungle in All Directions…

Tips For Visiting Calakmul

  • The ancient ruins of Calakmul are HUGE. Plan to spend at least 4 hours exploring the site, if not more.
  • If driving from Xpujil, first you’ll have to enter the Biosphere Reserve. From here you still have a winding hour-long drive to the ruins.
  • Yes, you can climb the ruins! This is rare in Mexico these days, but I think it’s because this site gets so few tourists.
  • You can hire a tour guide at the entrance for about $600 MXN pesos who will explain the history and culture of the site.
  • If you go on a weekday around 8am when they first open, you may be the only ones there!
Travel Planning Resources For Calakmul
Calakmul Entry Fee: $200 MXN ($10 USD)
Opening Hours: 8am – 5pm

Packing Guide

Check out my travel gear guide to help you start packing for your trip.

Book Your Flight

Ready to fly? Here’s how I find the cheapest airline flights.

Rent A Car

Discover Cars is a great site for comparing car prices to find a deal.

Cheap Accommodation

Learn how I save money booking hotels & vacation apartments.

Protect Your Trip

Don’t forget travel insurance! Protect yourself from possible injury & theft abroad. Read why you should always carry travel insurance.

READ MORE MEXICO TRAVEL TIPS

I hope you enjoyed my guide to exploring the remote Calakmul Mayan Ruins! Hopefully you found it useful. Here are a few more wanderlust-inducing articles that I recommend you read next:

Have any questions about Calakmul? What are your favorite Mayan ruins? Drop me a message in the comments below!

This is a post from The Expert Vagabond adventure blog.


from Expert Vagabond https://ift.tt/2iyJl9P

Thursday, October 15, 2020

10 Awesome Online Photography Classes To Improve Your Photos

Online Photography Classes Review
Best Online Photography Classes of 2020
Photography Tips

Want to become a better photographer? Stuck at home in lock-down? Try joining these great online photography classes & courses created by pros to improve your photos.

So, you’ve bought a nice camera. You’ve watched a few YouTube videos.

But why doesn’t your Instagram look as good as other photographers’?

Well, aside from the many years of experience and practice they have under their belts, another likely reason is the hundreds of hours they’ve probably spent working under mentors, attending workshops, taking college courses, or joining online photography classes.

The key to getting better at something — is to never stop learning.

Even after 10-years working as a freelance travel photographer, I’m still actively learning new techniques to improve my images. Photography classes, courses, and tutorials are a big part of this.

So I wanted to share some of my favorite online photography courses.

These photo tutorials go into extreme detail on topics like planning, composition, advanced techniques (focus stacking, time-lapses, long exposure, etc.) post-processing skills, social media tips, and even making money with your photography.

There’s no need to spend thousands of dollars on a college photography degree when you can study from home using these great online photography courses produced by working professionals.

The perfect way to kill some time during this worldwide pandemic we’re in.

Best Online Photography Classes

1. 5DayDeal Photography Bundle

5DayDeal Photography Tutorials

The biggest photography tutorial deal of the year is happening right now! Every year, the guys at 5DayDeal.com put together a MASSIVE bundle of photography classes from some of the world’s top photographers in multiple genres like landscape, travel, fashion, portraits, and more.

This is actually 26 different tutorials & courses worth $2,700 — for only $89.

That’s a 96% discount off the regular price if you bought them all independently…

As per the name, the 5DayDeal Photography Bundle is only available between October 15th to October 20th, 2020. For 5-days only.

motionmailapp.com

Some of the highlights for me in this bundle include courses like:

  • Time Blending & Complex Masking By Mads Peter Iversen
  • How To Photograph Landscapes In Any Lighting By Nigel Danson
  • Jimmy’s Big 5 Photos Course By Jimmy McIntyre
  • Capture The Night By Ryan Dyar
  • Beautiful World Foundations By Jessica Drossin

But in total, there are 26 different photography tutorials/courses/presets that you get when you purchase this bundle. Plus 10% of every bundle purchase is donated to charity.

As part of the deal, there’s also a free photography giveaway worth over $10,000 (featuring Peak Design Travel Tripods, camera backpacks, a 13″ MacBook Pro, and more!)

TO SWEETEN THE DEAL: If you buy the bundle using my link below, I’ll also throw in a FREE online webinar where you can watch me edit one of my favorite travel photos in real time!

Buy The Photography Bundle Here →

2. Landscape Photography In Depth

By Daniel Kordan

Daniel Kordan Landscape Tutorial

Daniel Kordan is one of my favorite landscape photographers, and he has an online photography tutorial called Landscape Photography In Depth that shows exactly how he creates his incredible images in a series of videos.

It takes a lot more work than you think it does! I spent many hours watching this course, and learned a lot about scouting locations and post-processing techniques. One of the best tutorials out there.

Buy Daniel Kordan’s Course Here →

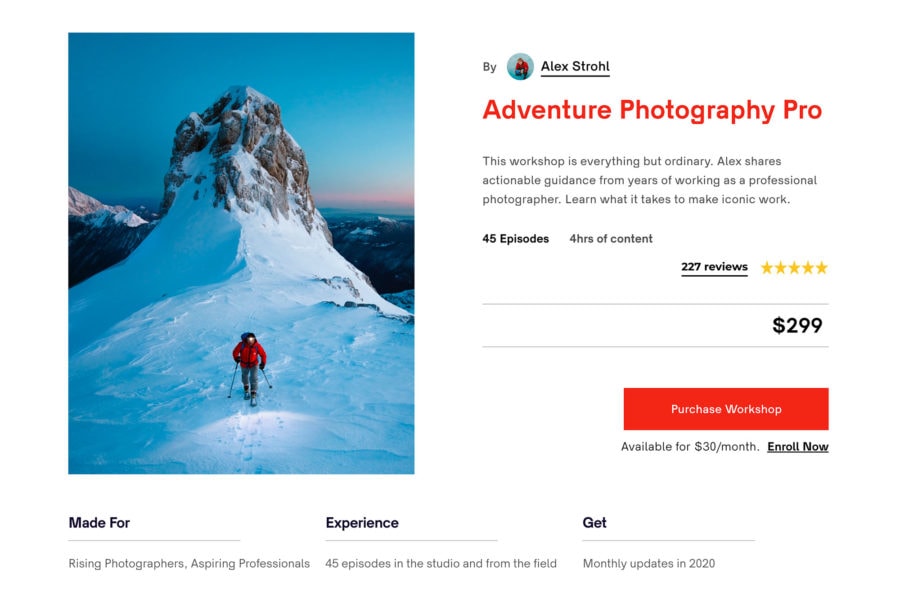
3. Adventure Photography Pro

By Alex Strohl

Adventure Photography Online Course

Alex Strohl is one of my favorite outdoor adventure photographers, so when I learned he created his own online photography class called Adventure Photography Pro, I signed up ASAP! Alex shoots professionally for some HUGE brands, so it was super interesting to learn about this part of his business (along with actual examples on location with clients).

He spends a lot of time going over the storytelling process, the importance of planning & scouting before shooting, reaching out to potential clients, building an audience, his editing techniques, and much more. Make sure to use my discount code VAGABOND20 to get 20% off the price!

GET 20% OFF WITH CODE: VAGABOND20

Buy Alex Strohl’s Course Here →

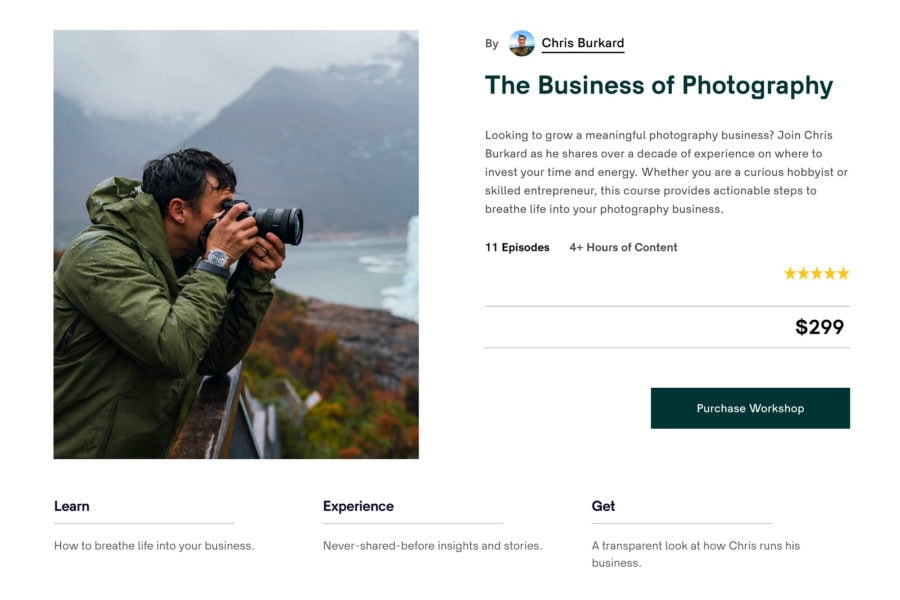
4. The Business Of Photography

By Chris Burkard

Business of Photography Class

Chris Burkard, if you’ve been living under a rock, is one of the most accomplished travel & adventure photographers out there right now. Not only is his photography incredible, his business chops have made him a household name.

From prints, to books, to movies, to huge commercial projects with brands like Apple, Toyota, Sony, The North Face, Patagonia, CitiBank, Microsoft, Volkswagen — Chris seems to do it all!

Well, now you can too, with his Business Of Photography Course that explains when and how to grow your business, diversifying revenue, working with agents, modern marketing techniques, and more. Make sure to use my discount code VAGABOND20 to get 20% off the price!

GET 20% OFF WITH CODE: VAGABOND20

Buy Chris Burkard’s Course Here →

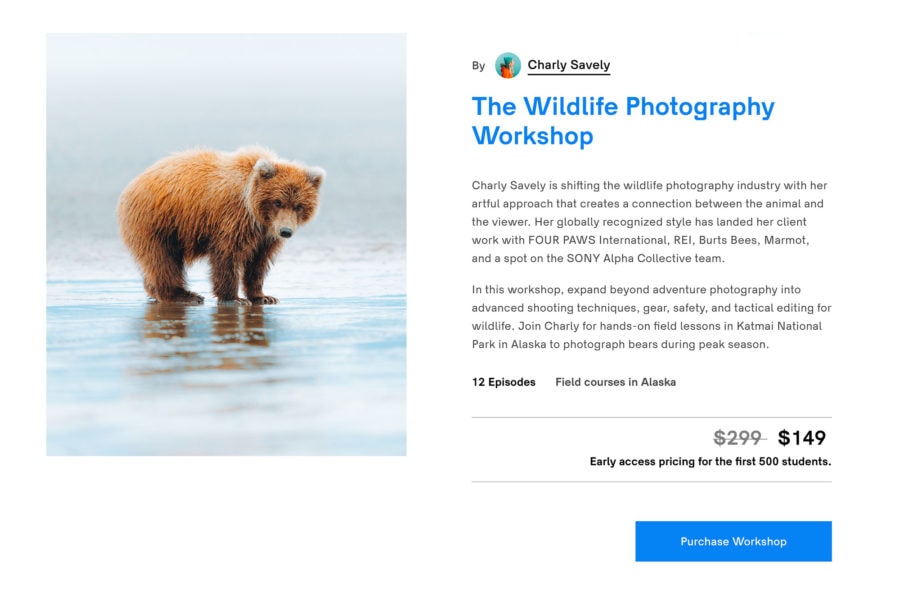
5. Wildlife Photography Workshop

By Charly Savely

Wildlife Photography Course

Professional wildlife photographer Charly Savely captures some of the most incredible photos of animals I’ve ever seen. And, she’s recently decided to share her secrets with the world through her online Wildlife Photography Workshop recorded in Alaska’s Katmai National Park.

Learn how she chooses her lenses, framing for impact, camera settings for handheld or tripod use, using art to influence your style, where to find wildlife, how to photograph animals safely, shooting in the cold, and how she edits her images for an emotional reaction. Make sure to use my discount code VAGABOND20 to get 20% off the price!

GET 20% OFF WITH CODE: VAGABOND20

Buy Charly Savely’s Course Here →

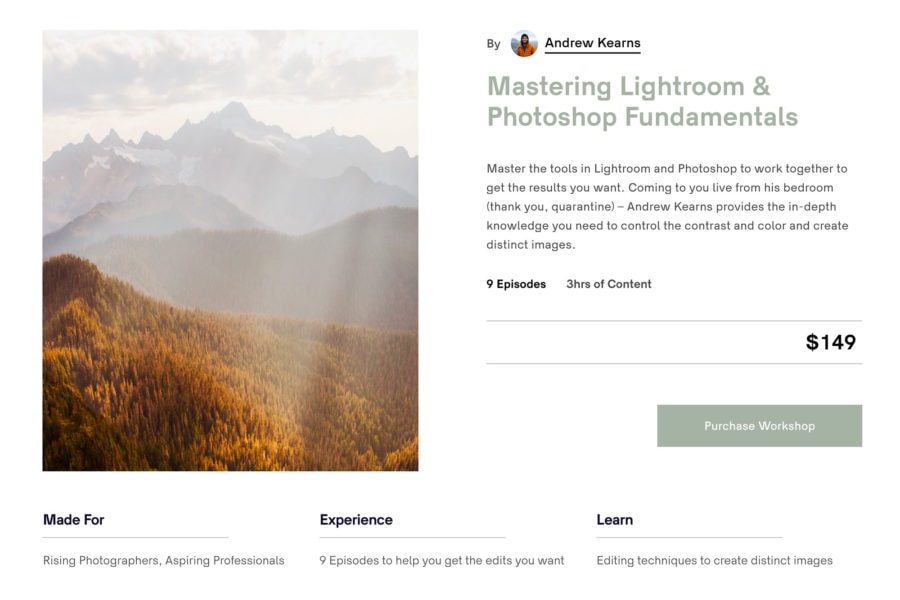
7. Mastering Lightroom & Photoshop

By Andrew Kerns

Online Lightroom & Photoshop Class

Every professional photographer uses post-processing techniques to make their images stand out. In fact, editing & post-processing your images is a major part of the photography workflow. You can’t ignore mastering the skills of photography software if you want to make a living with photography!

Luckily Andrew Kerns put together an amazing online class to help you learn the latest Adobe Lightroom & Photoshop techniques that professionals like him use: manipulating luminance, contrast, color, curves, split-toning, re-touching tips and much more. Make sure to use my discount code VAGABOND20 to get 20% off the price!

GET 20% OFF WITH CODE: VAGABOND20

Buy Andrew Kern’s Course Here →

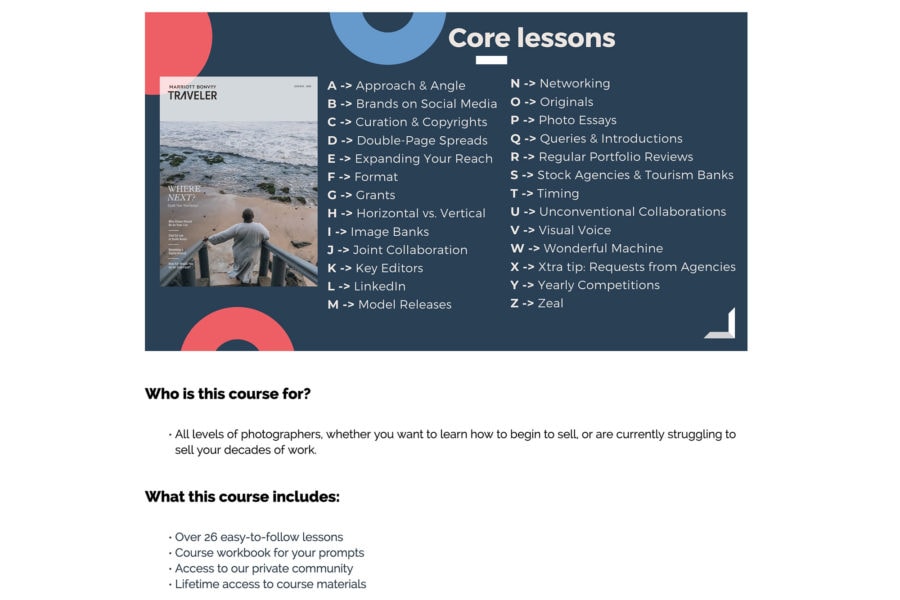
8. A To Z Of Selling Your Photos

By Lola Akinmade

A To Z Photography Class

Lola Akinmade is an award-winning travel photographer who’s work is regularly published by brands like: National Geographic Traveller, Travel & Leisure, The New York Times, Vogue, Outside, Smithsonian Journeys, the BBC, and The Telegraph to name just a few.

She’s also put together an excellent online photography class that goes into detail about HOW to sell your photos to these types of organizations. From approaching brands, how to deal with copyrights, working with editors, obtaining model releases, seeking out grants and much more.

Buy Lola’s Akinmade’s Course Here →

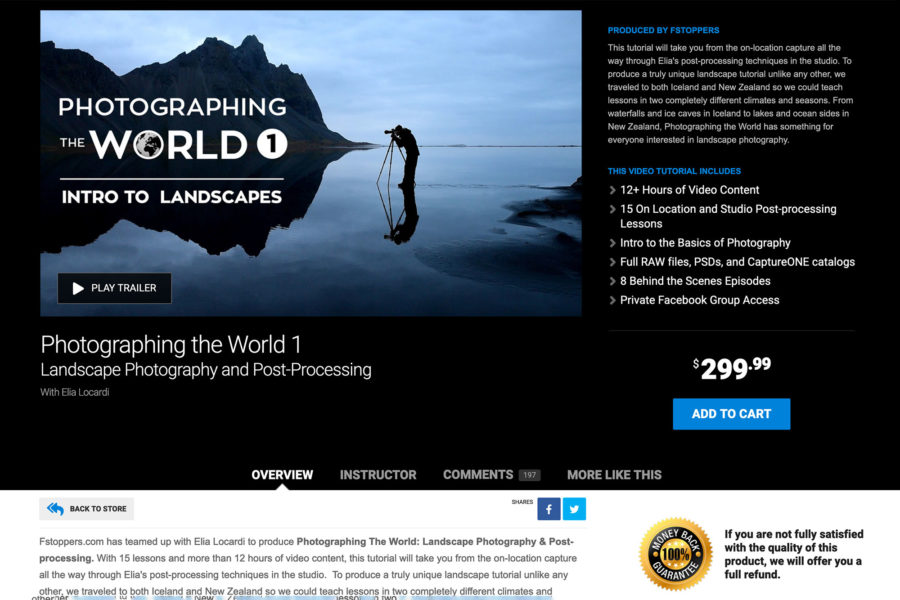
9. Photographing The World

By Elia Locardi

World Photography Course

Elia Locardi is a very successful landscape photographer who’s been traveling the world for years. His course Photographing The World is packed full of tips & post-processing techniques he uses to create his landscape and travel photography.

With 15 lessons and more than 12 hours of video content, his photography tutorial takes you from the on-location capture (in places like Iceland & New Zealand) all the way through his post-processing techniques in the studio.

Buy Elia Locardi’s Course Here →

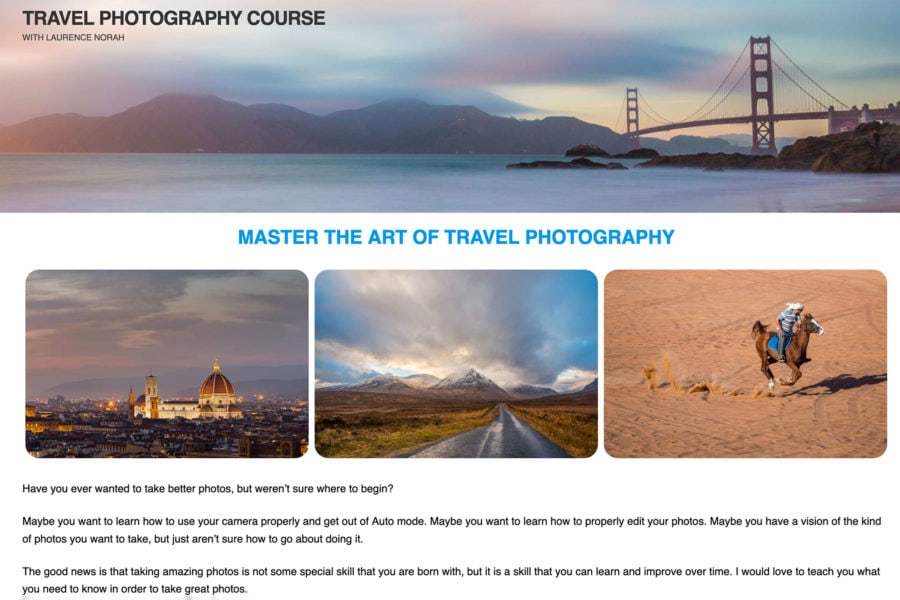
10. The Travel Photography Course

By Laurence Norah

The Travel Photography Course

Want to learn how to compose a better image while telling a story with your camera? Or the technical side of photography like understanding what aperture, shutter speed and ISO really do? These are just some of the topics travel photographer Laurence Norah goes over in his Travel Photography Course.

The course is structured well for complete beginners to photography, but with helpful tips for the business and professional side of things too. With 10 weeks of content and over 60 individual lessons, you’ll have plenty to keep you busy!

Buy Laurence Norah’s Course Here →

Free YouTube Photography Tutorials?


Subscribe to my YouTube Channel for new Adventure Travel Videos!

Yes, there are thousands of free photography tutorials on YouTube (in fact, here’s one of mine!) While you can certainly learn from them, I find that investing in a paid course provides the highest quality experience.

Maybe I’ll share some of my favorite free photography tutorials in a future article. Because there’s a lot of crap on YouTube too…

The BEST online photography courses demand a TON of time and knowledge to put together, and when done well, they’re just as useful as working under a mentor or taking classes in person.

Developing Your Photography Style

One of the most important aspects of becoming a professional photographer is developing your own personal style of photography. Whether that’s subject matter, editing style, or both.

By learning from other photographers through online classes, you can pick and choose parts of their workflow and style that you like, then adjust for your own use. We all get inspiration from others — it’s just the nature of art.

Learn as much as you can about the craft, then use that knowledge to develop your own signature look and make your work stand out!★


Enjoy This Post? Pin It!

READ MORE TRAVEL PHOTOGRAPHY TIPS

I hope you enjoyed my guide to the best online photography classes! Hopefully you found it useful. Here are a few more photography articles that I recommend you read next:

Have any questions about these online photo courses? Any good ones I missed? Drop me a message in the comments below!

This is a post from The Expert Vagabond adventure blog.


from Expert Vagabond https://ift.tt/3nP522B

Thursday, September 17, 2020

Peak Design Travel Tripod: The Ultimate Photography Tool?

Peak Design Travel Tripod
Peak Design Travel Tripod Review
Photography Gear Review

After 4-years of development, the Peak Design Travel Tripod is finally out! Here’s why I think it’s the best lightweight tripod for travel & backpacking adventures.

If you’re a frequent traveler like me, or enjoy hiking out into the backcountry with your camera, finding a great lightweight travel tripod can be a difficult task.

You want it to be sturdy of course — but small, lightweight, and easy to pack too.

I’ve owned many travel tripods over the years, but Peak Design’s new Travel Tripod is the closest I’ve found to perfection — lightweight, compact, and an innovative design makes it the best lightweight tripod on the market right now.

If you’re looking for a high-quality tripod for travel & backpacking, it’s a great choice!

Below I’ll give you a rundown of its features, the how to use it, and some of the reasons it’s become one of my favorite pieces of photography gear.

Peak Design Travel Tripod Review

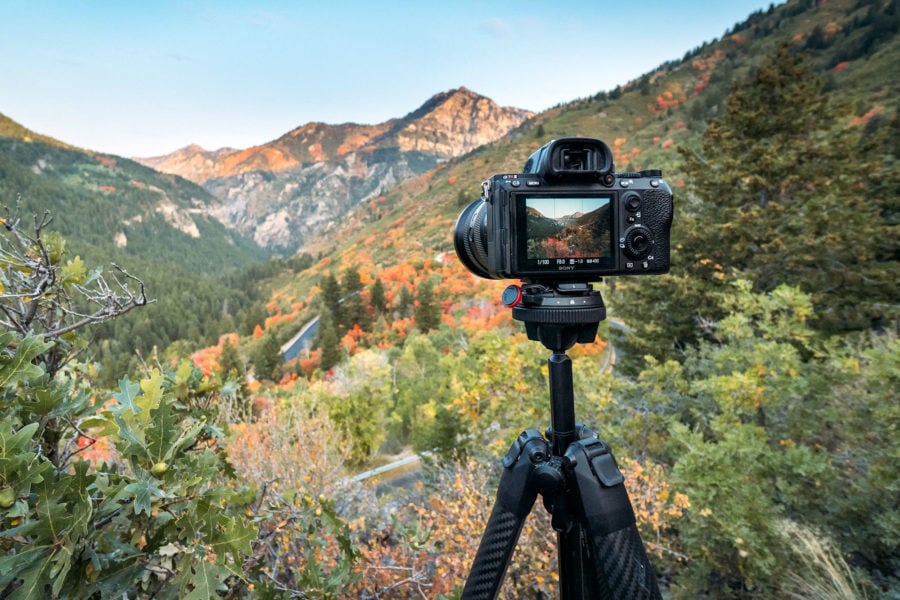
Focus Stacking with the Travel Tripod
Focus Stacking in the Unita Mountains

The Travel Tripod is available in two versions and price points — aluminum ($350) and carbon fiber ($600). I own and have been using the carbon fiber version since July, and it became a mainstay in my travel photography kit.

I’d say I pack it on 75% of my photography trips these days, due to its compact nature. It’s really easy to travel with compared to other tripods!

Tripod Specs & Features

Weight (Carbon Fiber Version): 2.81 lbs (1.27 kg)
Weight (Aluminum Version): 3.44 lbs (1.56 kg)
Maximum Height: 60″ (152 cm)
Minimum Height: 5.5″ (10 cm)
Folded Length: 15.2″ (39 cm)
Load Capacity: 20 lbs (9.1 kg)
Tripod Leg Sections: 5

The Ultimate Travel Tripod

Peak Design Tripod Folded
Packs Down Super Small!

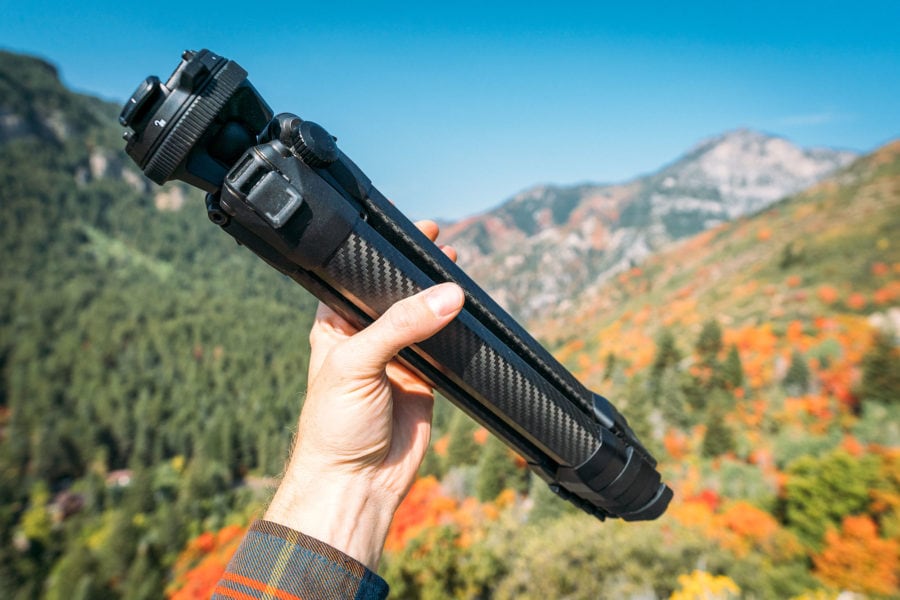
My favorite feature of the Peak Design Travel Tripod is just how small & sleek the tripod is when fully collapsed — there is no wasted empty space!

I don’t know how they did it, but the tripod’s folded diameter is very small, so it can fit into a water bottle pocket on the side of a backpack (or even INSIDE a backpack).

The tripod’s legs have five sections with a lever lock for each. Its maximum height is 60” inches (152.4 cm) with the center column raised. This is actually very tall!

Because I’m six feet tall, with most travel tripods I have to bend over quite a bit to look into my camera, but not this one. Which is pretty amazing with how small it packs down!

Travel Tripod Size
Peak Design Size Comparison (center)

Its minimum height with the collapsed legs extended wide (“low mode”) is 5.5” (14 cm). In “table top mode” the maximum height is 22.5” (57.2 cm) with the center column raised and 13.125″ (35.9 cm) with the center column down. 

Lightweight Yet Stable

As for weight capacity, it easily carries most cameras and lenses. Including a 70-200mm telephoto lens. It’s incredibly sturdy even with the tripod leg sections fully extended.

In fact, this is what’s most surprising about the tripod. Many lightweight travel tripods with several leg sections can be wobbly and unstable in the wind — this one is not!

Peak Design’s special omni-directional ball head is another great feature. It is ARCA SWISS compatible and has a standard camera plate, an adjustment ring, locking ring, quick release, and a bubble level.

It also features two removable pins that make it L-bracket compatible. The ball head is detachable from the center column as well (I’ll talk more about this below).

The Travel Tripod In Action

Setting up the Peak Design travel tripod is simple. The cam levers are easy to open and lock very securely so there’s little chance of them opening accidentally.

The tripod won’t slip on most surfaces thanks to its rubberized feet (if you shoot in icy or snowy conditions and want more grip, Peak Design sells a spiked-feet set for $25).

A small adjustment knob controls the raising and lowering of the center column. The adjustment ring is smooth and easy to operate. A locking ring prevents the quick release from being used accidentally.

There is a detachable hook on the bottom end of the center column that you can hang your bag on for even more stability.

Removable Center Column

The ball head is detachable from the center column. This allows the tripod to go into “low mode” (5.5” or 14 cm from the ground), which is perfect for wide angle, macro, or creative shots.

It also gives you the option of using Peak Design’s universal head adapter, which you use to attach a third-party tripod head, like one with video pan & tilt controls.

You can also make the tripod weigh even less! The company sells ultralight conversion kit, which consists of three special feet that transforms it into a table-top tripod. Perfect if you are trying to save weight on a long-distance backpacking trip!

Other Cool Peak Design Features

Tripod Smartphone Mount
Handy Smartphone Mount Included!

Hex Wrench Tool

The tripod has a hex wrench tool mounted to a removable leg clip holder, plus a bushing removal tool (used for maintenance and stored in a hidden pocket in the tripod case).

Keep the hex wrench tool with you at all times! You need it to attach the plate to the camera, remove the two pins on the ball head plate, and remove the ball head from the center column.

Secret Mobile Phone Mount

The travel tripod comes with a a very cool mobile phone mount, stored in the bottom of the center column above the detachable hook (a magnet keeps it from falling out when you remove the hook!).

It snaps easily onto the ball head and grips phones securely.

I find its great for shooting Instagram Stories of yourself on the go, and for Instagram or Facebook Live posts. No need to lug around a separate iPhone tripod mount!

A Few Downsides…

Despite all of the great features of the Peak Design travel tripod, it does have a few minor disadvantages. One is that the legs only have two leg angles — tall or very low, there’s no middle angle. Many tripods usually have 3 angles.

Another issue is the lack of a video panning knob. You can still turn the ball head horizontally with your hand, but unless you have very steady hands, it won’t be super smooth. For video work you might want a dedicated video head.

The hex wrench tool is easy to lose. I’ve already lost my tool once, so now I just keep it in my camera bag rather than attached to the tripod.

Finally, the awesomeness of this travel tripod comes at a price. The aluminum model is $350 while the carbon fiber model costs $600. Not the most expensive tripods out there, but not really cheap either.

My Favorite Travel Tripod Right Now

The Peak Design Travel Tripod is a great product. Its compact size and low weight make it ideal for traveling, backpacking, and every-day photography.

It’s stable, well designed, and securely supports the vast majority of cameras, even your smartphone. And if you have a favorite ball head, simply swap it in using the ball head adapter.

While not cheap, it’s an outstanding lightweight tripod overall. It will keep your camera secure and your back happy while traveling and hiking! ★

Buy The Peak Design Tripod Here →

Enjoy This Post? Pin It!

READ MORE TRAVEL PHOTOGRAPHY TIPS

I hope you enjoyed my review of the Peak Design Travel Tripod! Hopefully you found it useful. Here are a few more photography articles that I recommend you read next:

Have any questions about the Peak Design travel tripod? Are you planning on buying one? Drop me a message in the comments below!

This is a post from The Expert Vagabond adventure blog.


from Expert Vagabond https://ift.tt/3mvTJM2

Wednesday, September 16, 2020

How To Save Money On Flights With Mistake Fares (Pro Tip!)

Find Mistake Fares for Cheap Flights
Secret Flying Tip: Book Mistake Fares
Flying Travel Tips

Want to save money on flights? Professional travelers have a secret trick called “mistake fares” which helps them find amazing airline deals that other people miss.

Although less common, error and mistake fares on flights do happen on a regular basis. If you know how to track and spot them, you can snag some of the cheapest flights possible.

In this guide I’ll show you how to make use mistake fares to save hundreds of dollars on your next airline ticket!

What Are Error & Mistake Fares?

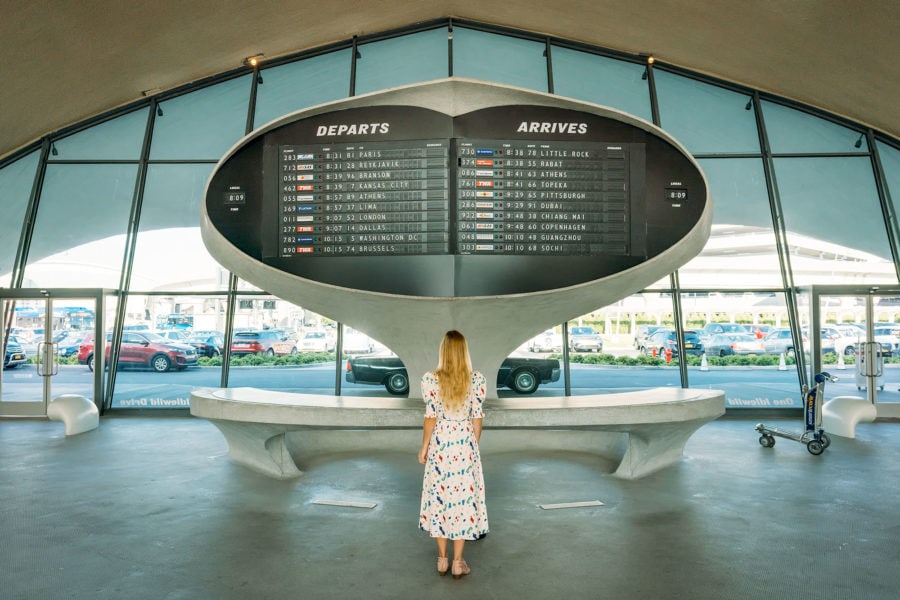
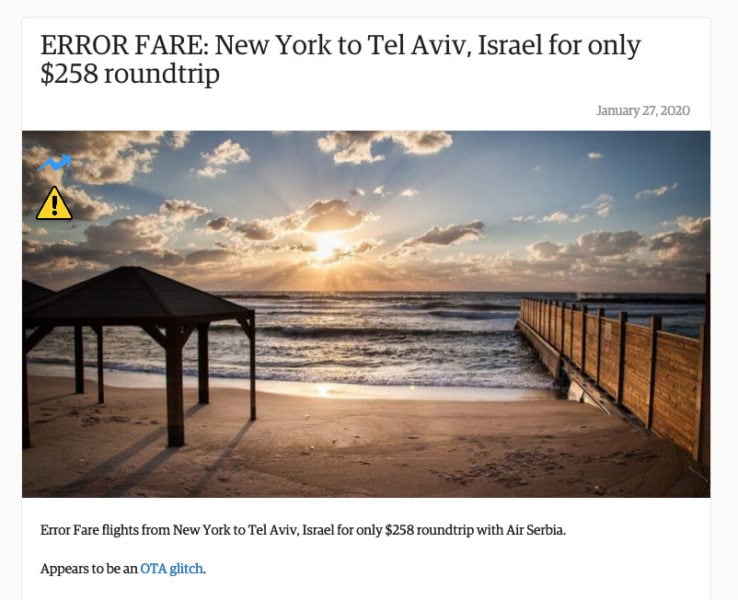
From time to time, airlines and travel sites make mistakes when listing their fares, and advertise a flight for significantly less money than intended.

If you can catch their mistake on time and book a flight, they are obliged to honor that posted price, and you can save hundreds of dollars on a flight.

For example, a flight from New York to Paris might be listed by mistake for only $100, a huge error from the normal price of about $1000 for a round trip ticket.

Error and mistake fares can occur for a number of reasons:

  • Human Error – The saying goes, “Everyone makes mistakes.” Well, that’s just as true in the travel industry. Like the case with that flight from Paris, the administrator likely forgot to add a 0 to the price tag.
  • Technology Glitches – These days, airlines use complex algorithms to automatically generate flight rates. Technology issues can lead to errors on their websites, resulting in mistake fares.
  • Miscommunication – Communication problems between the airline and third-party sellers, such as comparison sites, can result in flight errors, like incorrect fares.
  • Foreign Currency Conversion – Airlines may post rates in the incorrect currency, which result in error fares. Paying 1000 Indian Rupees for a flight definitely is a fraction of the cost for paying 1000 US Dollars, for instance.
  • Route Fees – Depending on the flight itinerary, airlines may need to include fees in their fares, such as fuel surcharges. Rerouting or forgetting to include these fees can cause a ticket price to drop by mistake.

How To Find Airline Mistake Fares?

Mistake Fare Flight Alerts
Finding Mistake Fares & Discount Flights

Error and mistake fares, while uncommon and unpredictable, still happen regularly enough to keep an eye out for them.

Special tracking sites can do this for you automatically — so you don’t have to check flight prices manually (which would be crazy time-consuming).

You can sign up for mistake fare newsletters or follow the social media profiles of these tracker sites to get price alerts as soon as mistake fares happen.

Or, just check their website on a regular basis before planning a trip.

Taking advantage of mistake fares works best if you’re flexible with WHERE you want to go on vacation.

For example, if you wanted to visit Venice, but find an awesome mistake fare deal for Iceland that would save you $500, are you willing to update your travel plans?

Best Mistake Fare Tracking Sites

Secret Flying

Secret Flying offers a free service to find flight and hotel deals. The Error Fare section lists current mistake fares for impressive savings. For example, a recent round-trip flight from Budapest, Hungary to Sao Paulo, Brazil mistakenly dropped to only 173 EUR.

Scott’s Cheap Flights

Scott’s Cheap Flights seeks out rare price drops and alerts you immediately. Those who travel often may want to invest in the Premium Subscription , which costs $49 per year, with special deals reserved for paying members only (I am one, and it’s great!).

Fly4Free

Fly4Free regularly updates their page with the latest mistake fares on flights. Subscribe to their daily newsletter for updates, so you don’t miss a good deal while it lasts.

TheFlightDeal

TheFlightDeal searches the web for some of the best deals on flights and other travel costs. Sign up for their newsletter to get mistake fares sent straight to your inbox, along with deals on credit card offers, hotels, and car rentals.

Airfare Watchdog

Airfare Watchdog will automatically send you alerts on the lowest flight prices and travel news. You can set up notifications linked to your favorite destinations by airport. On the website, search for deals on your next dream destination or browse through their list of current mistake fares.

Skyscanner

Skyscanner, my favorite flight comparison site, lists some of the lowest deals on flights. If you set up price alerts for your intended travel itinerary, Skyscanner will send notifications so you get good deals on flights and potential mistake fares.

Tips for Booking “Mistake Fare” Flights

Did you find a mistake fare for a fraction of the normal cost? Awesome. To lock in your lower rates, I suggest a few of the following tips:

Book Directly With The Airline

When you book with a third-party website, that travel site sends the booking to the airline for confirmation. Flight confirmation from the airline can take up to 24-hours, enough time for airlines to correct the mistake fare.

Booking directly with the airline cuts out the middleman and gives you a better chance of snagging that mistake fare flight deal.

Also, keep in mind that in the United States, passengers get a 24-hour cancellation period when booking directly with an airline. That gives you a little flexibility in case you change your mind about a flight.

Wait Before Booking Additional Travel Plans

Once you book your mistake fare, I suggest waiting a couple of weeks before booking any hotels or car rentals at the destination. You need to make sure that your sweet flight deal gets approved.

You’ll receive an e-ticket number or 6-digit PNR code for your reservation.

Once you receive this confirmation, airlines are pretty much required to honor their ticket price, even if posted by mistake. Otherwise, they could suffer bad press and negative customer reviews.

Flying Doesn’t Have To Be Expensive!

Error and mistake fares stand out as just one of the many ways to save money traveling. After 10 years exploring the world, I’ve discovered many ways to save on everything from hotels to day to day expenses.

My Favorite Travel Tips

If you want to save more money on your next travel adventure, make sure to read my free ultimate guide to travel tips for beginners.

➜ Click Here For My Best Travel tips

Travel Planning Resources

Packing Guide

Check out my travel gear guide to help you start packing for your trip.

Book Your Flight

Ready to fly? Here’s how I find the cheapest airline flights.

Rent A Car

Discover Cars is a great site for comparing car prices to find a deal.

Cheap Accommodation

Learn how I save money booking hotels & vacation apartments.

Protect Your Trip

Don’t forget travel insurance! Protect yourself from possible injury & theft abroad. Read why you should always carry travel insurance.

Like This Post? Pin It!

READ MORE BUDGET TRAVEL TIPS

I hope you enjoyed my guide to mistake fare airline flights! Hopefully you found it useful. Here are a few more wanderlust-inducing articles that I recommend you read next:

Have any questions about booking mistake fares with airlines? What about other suggestions? Drop me a message in the comments below!

This is a post from The Expert Vagabond adventure blog.


from Expert Vagabond https://ift.tt/3mspbL7

Thursday, September 10, 2020

10 Countries With Digital Nomad & Remote Work Visas

Countries with Digital Nomad Visas
Working Abroad on a Digital Nomad Visa
Nomadic Living

Want to live & work from a Caribbean island or a historic European city? Special international visas for digital nomads and remote workers are finally here!

Traveling the world while working online from your laptop has been a dream for millions of self-proclaimed digital nomads — including me.

However working from foreign countries while traveling on a tourist visa is technically illegal in most places.

Tourist visas also usually expire after 30-90 days, and it’s not always easy to renew them. What if you want to stay longer?

That doesn’t stop digital nomads from working while traveling, but it can make things complicated, and with travel restrictions due to COVID-19, it’s much more difficult to work & travel internationally.

Visa laws in most countries are not set up to deal with this new class of modern nomads who are living and working remotely around the world.

But that’s finally starting to change, as some countries have recognized the need for and launched so-called “digital nomad visas”, “remote work visas”, or “freelancer visas” specifically to entice foreigners to come work & contribute to their economies.

Many of these destinations are hoping the remote work visas will generate income to help make-up for lost tourism revenue due to the pandemic.

Digital Nomads vs Freelancers

Digital nomads are basically remote workers who travel to different locations on a regular basis. They use modern technology to work from coffee shops, hotels, co-working spaces, or libraries with a WiFi connected laptop or smartphone from anywhere in the world.

Freelancers are self-employed, working for themselves or other companies as independent contractors. Freelancers can travel while they work, or just work from home while living in one place on a long-term basis.

The two are similar, but not exactly the same. The visas listed below can be obtained by both kinds of workers, digital nomads and freelancers.

Countries With Digital Nomad Visas

Work Remotely in Estonia with a Visa
Estonia’s E-Residency Program

Estonia

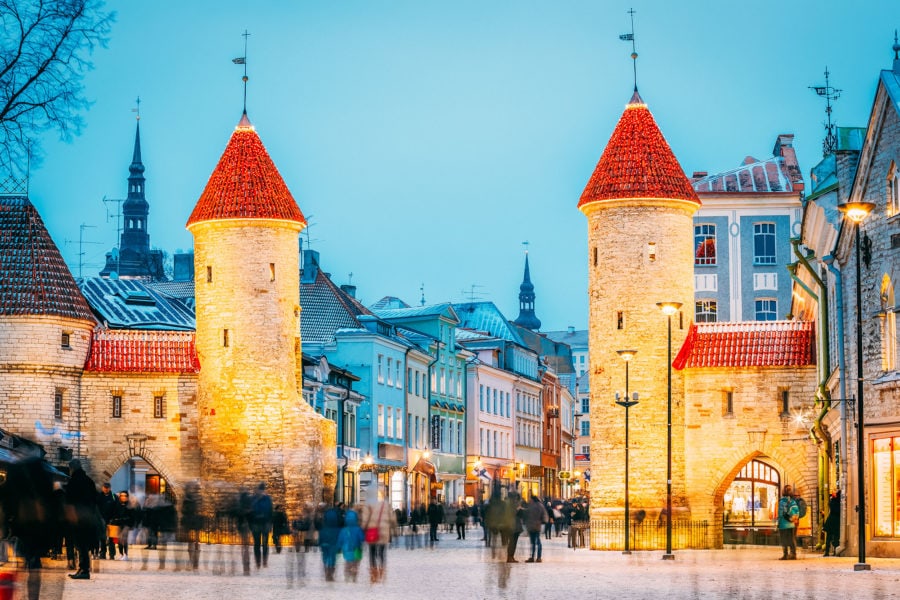
Estonia became the first country to create an e-residency program that allows foreign entrepreneurs to license an EU-based online business. Then, in June 2020, they also opened up a one-year digital nomad and freelancer visa that allows foreigners to live in the country while working remotely.

Basic Conditions

  • You own a location independent business (and/or)
  • You work remotely for a company based outside of Estonia
  • You earn at least €3504 per month for the last 6-months

How To Apply

  • Fill out the online application form, sign it, and make an appointment at your nearest Estonian Embassy/Consulate to submit it in person.
  • There are two types of digital nomad visas: Type C (short stay) costs €80, and Type D (long stay) costs €100.

Georgia

Partly due to the dramatic drop in tourism because of the Coronavirus pandemic, the country of Georgia is one of the latest to offer a digital nomad visa called “Remotely from Georgia” to help stimulate their economy. If you’re a remote worker, why not wait out the pandemic and work from a country known for its low-cost of living, colorful cities, and epic mountain landscapes?

Basic Conditions

  • You own a location independent business (and/or)
  • You work remotely for a company based outside of Georgia
  • You must prove financial ability to pay taxes while staying in Georgia
  • You earn at least $2000 per month
  • You must undergo mandatory 14-day quarantine
  • Obtain travel insurance valid for six months

How To Apply

Barbados

Barbados has also just opened its borders to digital nomads and remote workers who are looking to escape the pandemic while basing themselves in a beautiful island destination. The “Barbados Welcome Stamp” is a special 12-month visa for remote workers, which can also be renewed for even longer. Why not live next to the beach and work from home in Barbados!

Basic Conditions

  • You own a location independent business (and/or)
  • You work remotely for a company based outside of Barbados
  • You earn at least $50,000 per year
  • You must undergo mandatory COVID-19 test and 48-hour quarantine

How To Apply

Work From Bermuda Visa
Remote Work from an Island?

Bermuda

Bermuda has joined the remote work visa club! Their recently released “Work From Bermuda” digital nomad visa is just an expansion of an older residency program, which allows digital nomads and remote workers to stay in the country for up to a year. Aimed at professionals who normally work from home, they hope the new visa will attract long-term travelers who want to base themselves from an island destination.

Basic Conditions

  • You own a location independent business (and/or)
  • You work remotely for a company based outside of Bermuda
  • No minimum income requirement!
  • You must undergo mandatory COVID-19 test
  • Show proof of travel insurance

How To Apply

Croatia

In August of 2020 the prime minister of Croatia announced the country is going to start a digital nomad visa program soon. There are no details yet on specifics or dates, however I’ll make sure to post the latest updates here when available!

Countries With Freelancer Visas

The following countries have offered special freelance visas for many years now, they aren’t exactly new. However just in case you didn’t know they existed, here are more details!

Czech Republic

Spend your weekends exploring the historical towns and mountains of this Eastern European country, and work remotely during the week using their fast internet connection! The Czech Republic offers a freelancer visa called the Zivno. It’s valid for one year, and can be extended too. It’s a bit more complicated than other visas in this list, but it’s doable too.

Basic Conditions

  • You have a trade license for one of the trades listed here
  • Proof of accommodation for at least a year
  • Proof of at least €5,587 in your bank account (per person)
  • Pay about 1,800 Kč ($80 USD) per month in local taxes

How To Apply

  • It’s probably wise to hire an agency like this one to help you.
  • Gather this list of required documents
  • Make appointment at a Czech embassy for the long-stay visa
  • Pay the visa fee of €100

Germany

Germany has its own special freelance visa called the Aufenthaltserlaubnis für selbständige Tätigkeit (good luck saying that!). It’s a residence permit that allows foreign freelancers and self-employed people live in Germany for 6-months up to 3-years. One downside is that it can take 3-4 months to get approved for this visa. Plus speaking German, or knowing someone who does, will help a lot.

Basic Conditions

  • You need an address in Germany.
  • Proof of health insurance.
  • Proof of financial self-sustainability.
  • Work clients based in Germany. They want to see that you are providing services that will help the local economy.

How To Apply

  • Gather all documents required here.
  • Secure a residence in Germany
  • Book a visa appointment at the immigration office here.
  • Pay the visa fee of €100
Costa Rica Freelance Visa
Work Freelance in Costa Rica

Costa Rica

There are many digital nomads who choose to base themselves in Costa Rica due to the relaxed lifestyle, great surfing, nice beaches, and diverse landscape of volcanoes, waterfalls, and jungle. Costa Rica’s freelancer visa is called the Rentista, allowing foreigners to stay for up to 2-years, with the ability to extend it. This visa allows self-employed people or entrepreneurs to work in Costa Rica, but you can’t be an employee for another company.

Basic Conditions

  • Show income of $2,500 per month for two years or make a $60,000 deposit in a Costa Rican bank

How To Apply

  • Applying for the Rentista visa on your own through Costa Rica’s Migracion Website is possible, but not recommended. It’s better to hire an immigration lawyer to help you.
  • All your documents must be translated into Spanish, as well as authenticated in your home country.
  • Pay the visa fee of $250

Norway

Norway has been in the news a lot lately, touted as a Scandinavian paradise with its strong social democratic system, wealth, natural beauty, and progressive population. Lots of foreign digital nomads and remote workers would jump at the chance to move to Norway. And they can, for up to 2-years, with Norway’s Independent Contractor visa.

Basic Conditions

  • You must be self-employed with a contract to work on a project for a business in Norway.
  • You must have relevant qualifications to work in your profession.
  • Proof of accommodation in Norway
  • Show an income of at least €35,719 per year before tax

How To Apply

  • Gather the required documents listed on Norway’s Directorate of Immigration website.
  • Fill out the application, and bring it to the nearest Norwegian Embassy.
  • Pay the visa application fee of about €600
Moving to Spain for Nomads
Special Visa for Living in Spain

Spain

Spain has a Non-Lucrative Visa which allows foreigners to stay in Spain for at least a year, with the ability to renew. With it’s low-cost of living and mix of beaches, mountains, and relaxed lifestyle, it’s a favorite with many location independent people. However technically you are not allowed to “work” on this visa — they’re looking for people who are “retired” and self-sufficient.

Basic Conditions

  • Show that you can support yourself financially through investments or retirement income of at least €2151 per month or hold €25,816 in savings.
  • Proof of private Spanish health insurance
  • Get a police/FBI background check
  • Get a Medical Certificate of Good Health

How To Apply

  • You need to apply in person at the closest Spanish Consulate or Embassy.
  • All your documents must be translated into Spanish, as well as authenticated in your home country.
  • Sign a sworn statement before a Notary that you agree not to work while living in Spain.
  • Pay the visa application fee of $140 USD

Living A Nomadic Life Overseas

This relatively new phenomenon of countries launching digital nomad visas to attract remote workers was predicted over 20-years ago by Japanese technologist Tsugio Makimoto who wrote that remote working would force nations “to compete for citizens”, and that digital nomad-ism would prompt “declines in materialism and nationalism”.

His prophecy is coming true, and I fully expect to see many more nations opening up their borders to these “citizens of the world” who are able to work remotely from their laptops in the years to come. The future is going to be interesting, that’s for sure!

Enjoy This Post? Pin It!

READ MORE DIGITAL NOMAD TIPS

I hope you enjoyed my guide to countries with digital nomad & remote work visas! Hopefully you found it useful. Here are a few more wanderlust-inducing articles that I recommend you read next:

Have any questions about remote work visas? Drop me a message in the comments below!

This is a post from The Expert Vagabond adventure blog.


from Expert Vagabond https://ift.tt/35qiXFm

Help! I Spent a Fortune for a Credit-Card Companion Pass But the Virus Wouldn’t Quit

By BY SETH KUGEL from NYT Travel https://ift.tt/Dxdz0y4